Plotree User Manual
Create, connect, organize, arrange, and export branching story projects in Plotree.
Plotree helps writers design a branching narrative as a connected graph. A project contains the story flow, node text, writing notes, tags, characters, groups, and appearance settings.
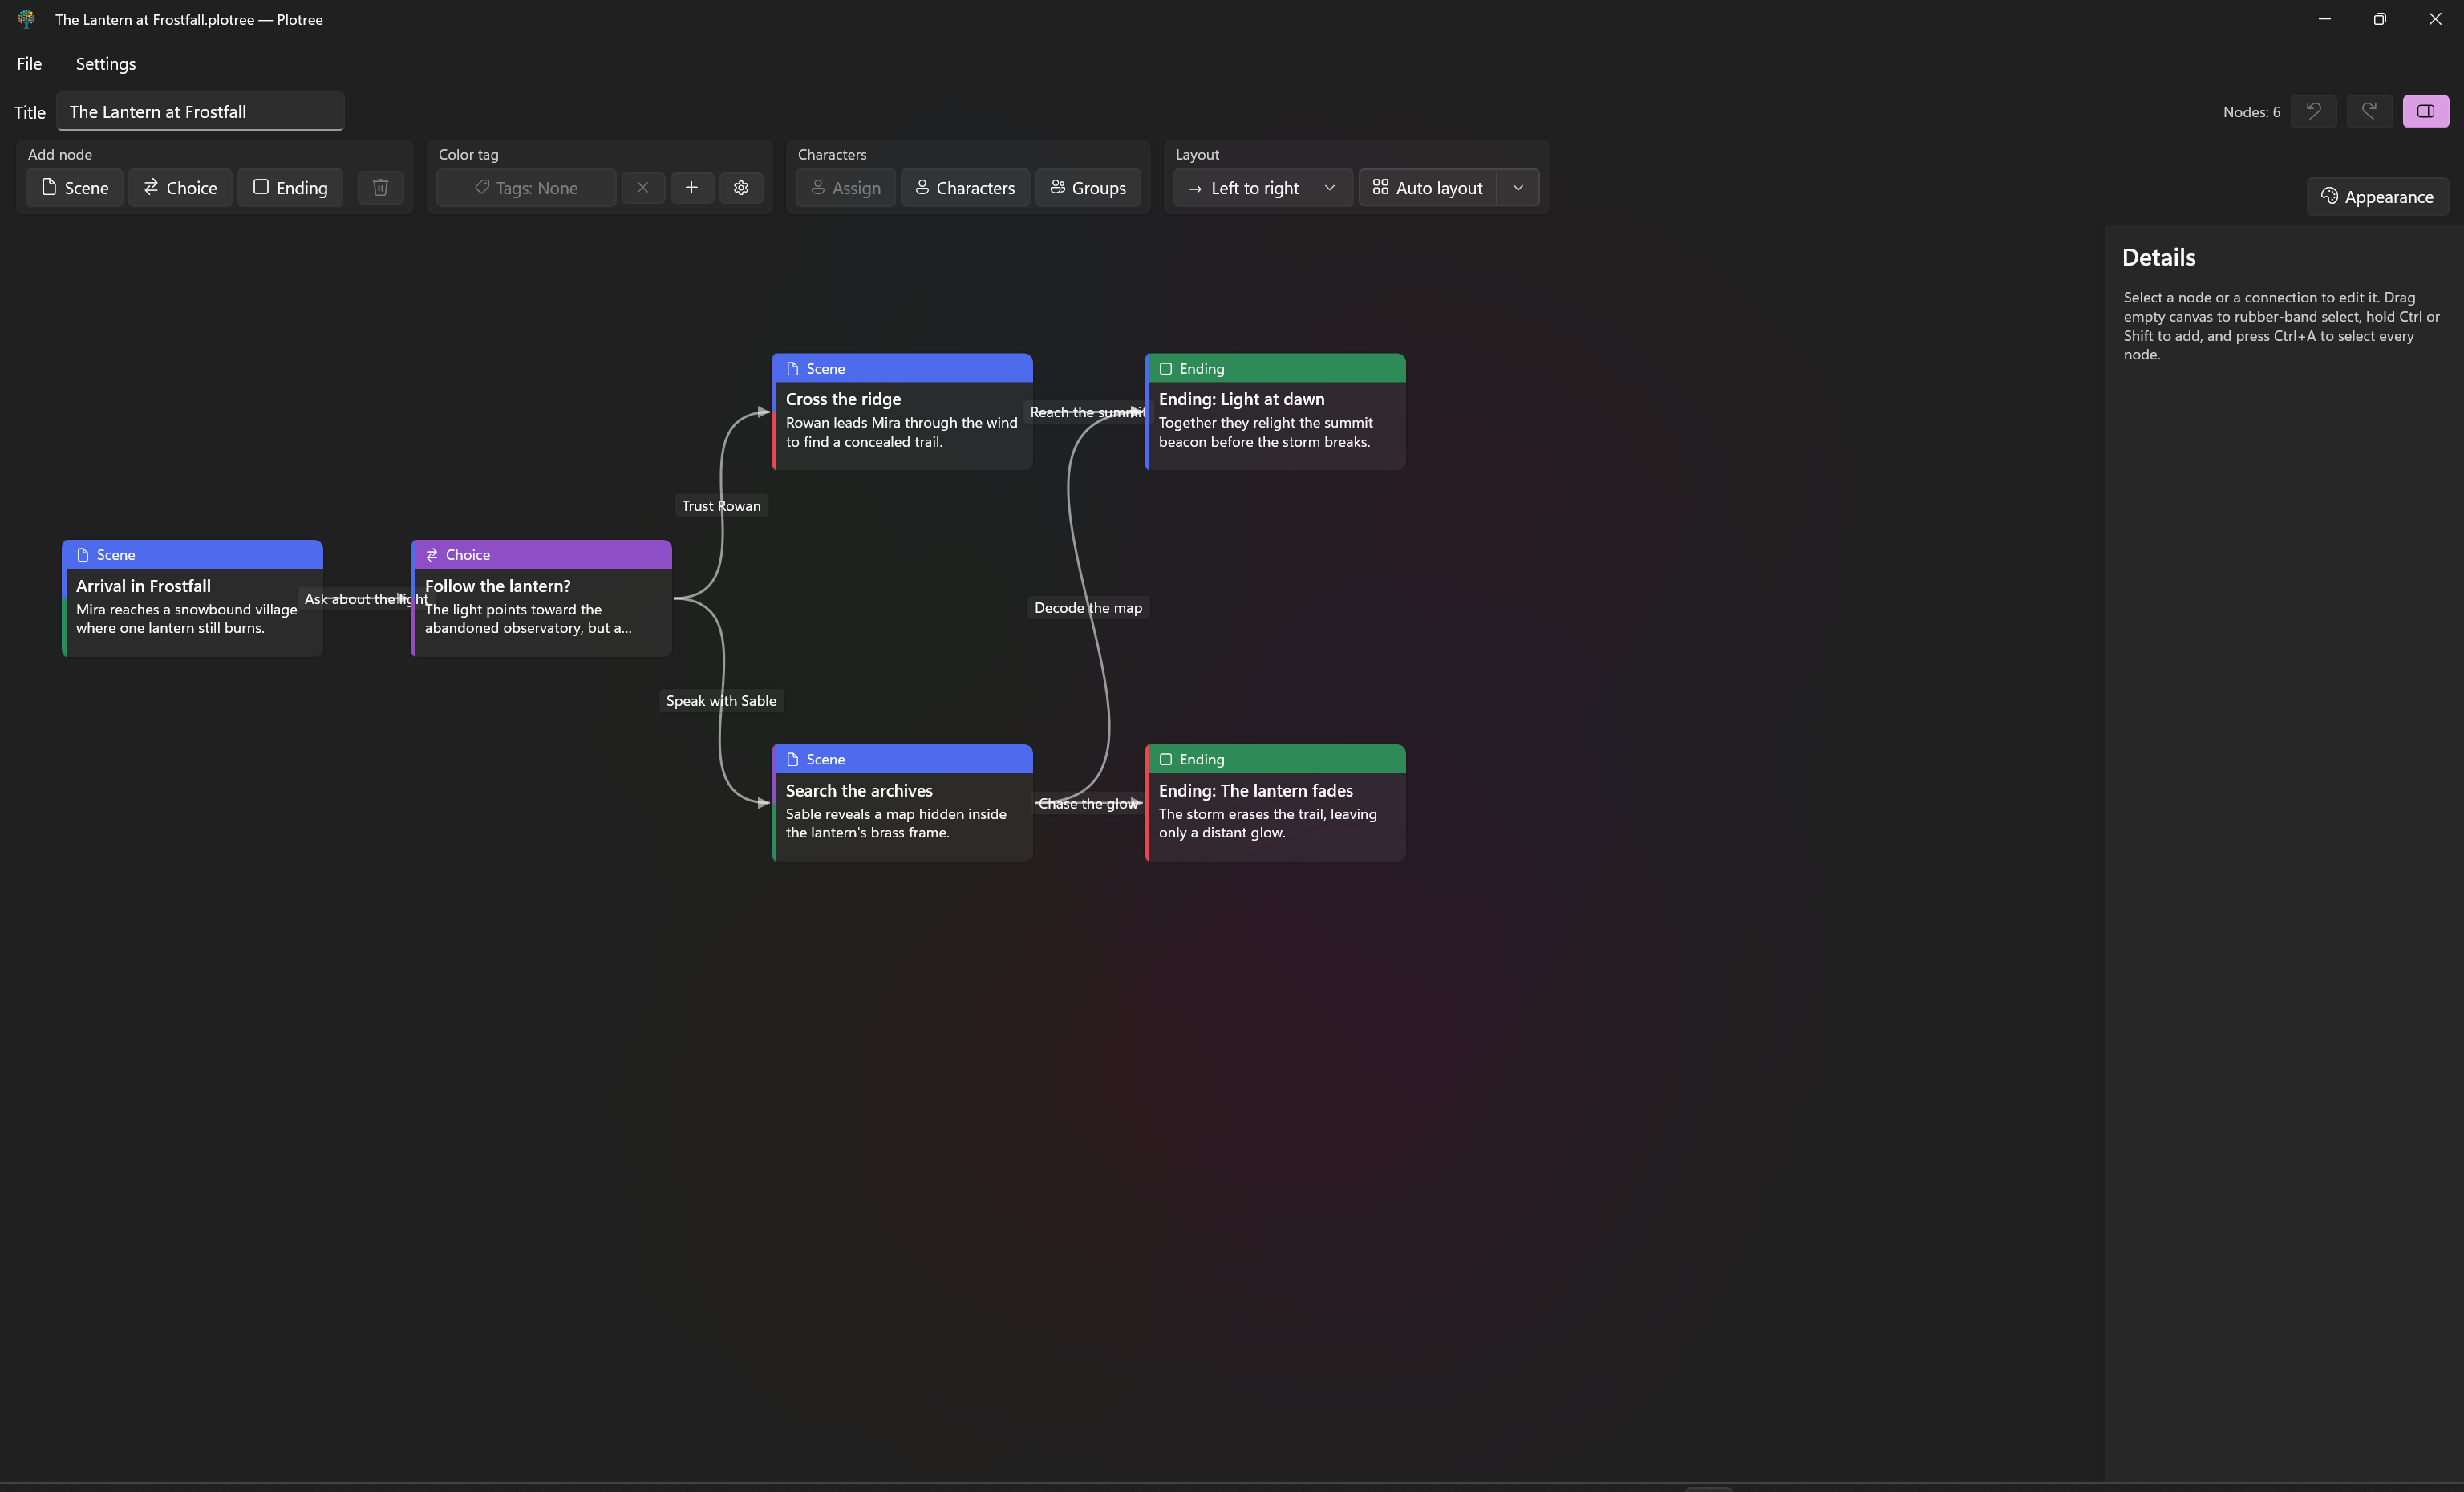
Start a project
Use File > New to create a project, then enter a project title in the title field. Use File > Open to continue a .plotree project, and File > Save or Save As to store it. Plotree files are formatted JSON and remain compatible through file-format migrations.
To open an existing project when launching the app, pass its .plotree path as the first command-line argument.
Build the story flow
- Add a Scene, Choice, or Ending from the toolbar or the canvas context menu.
- Select a node to edit its title, body text, and private writing memo in the details panel.
- Select or point to a scene or choice node, then drag from its round handle to another node to create a connection.
- Select a connection to give it a choice label.
- Add more endings to show alternate outcomes.
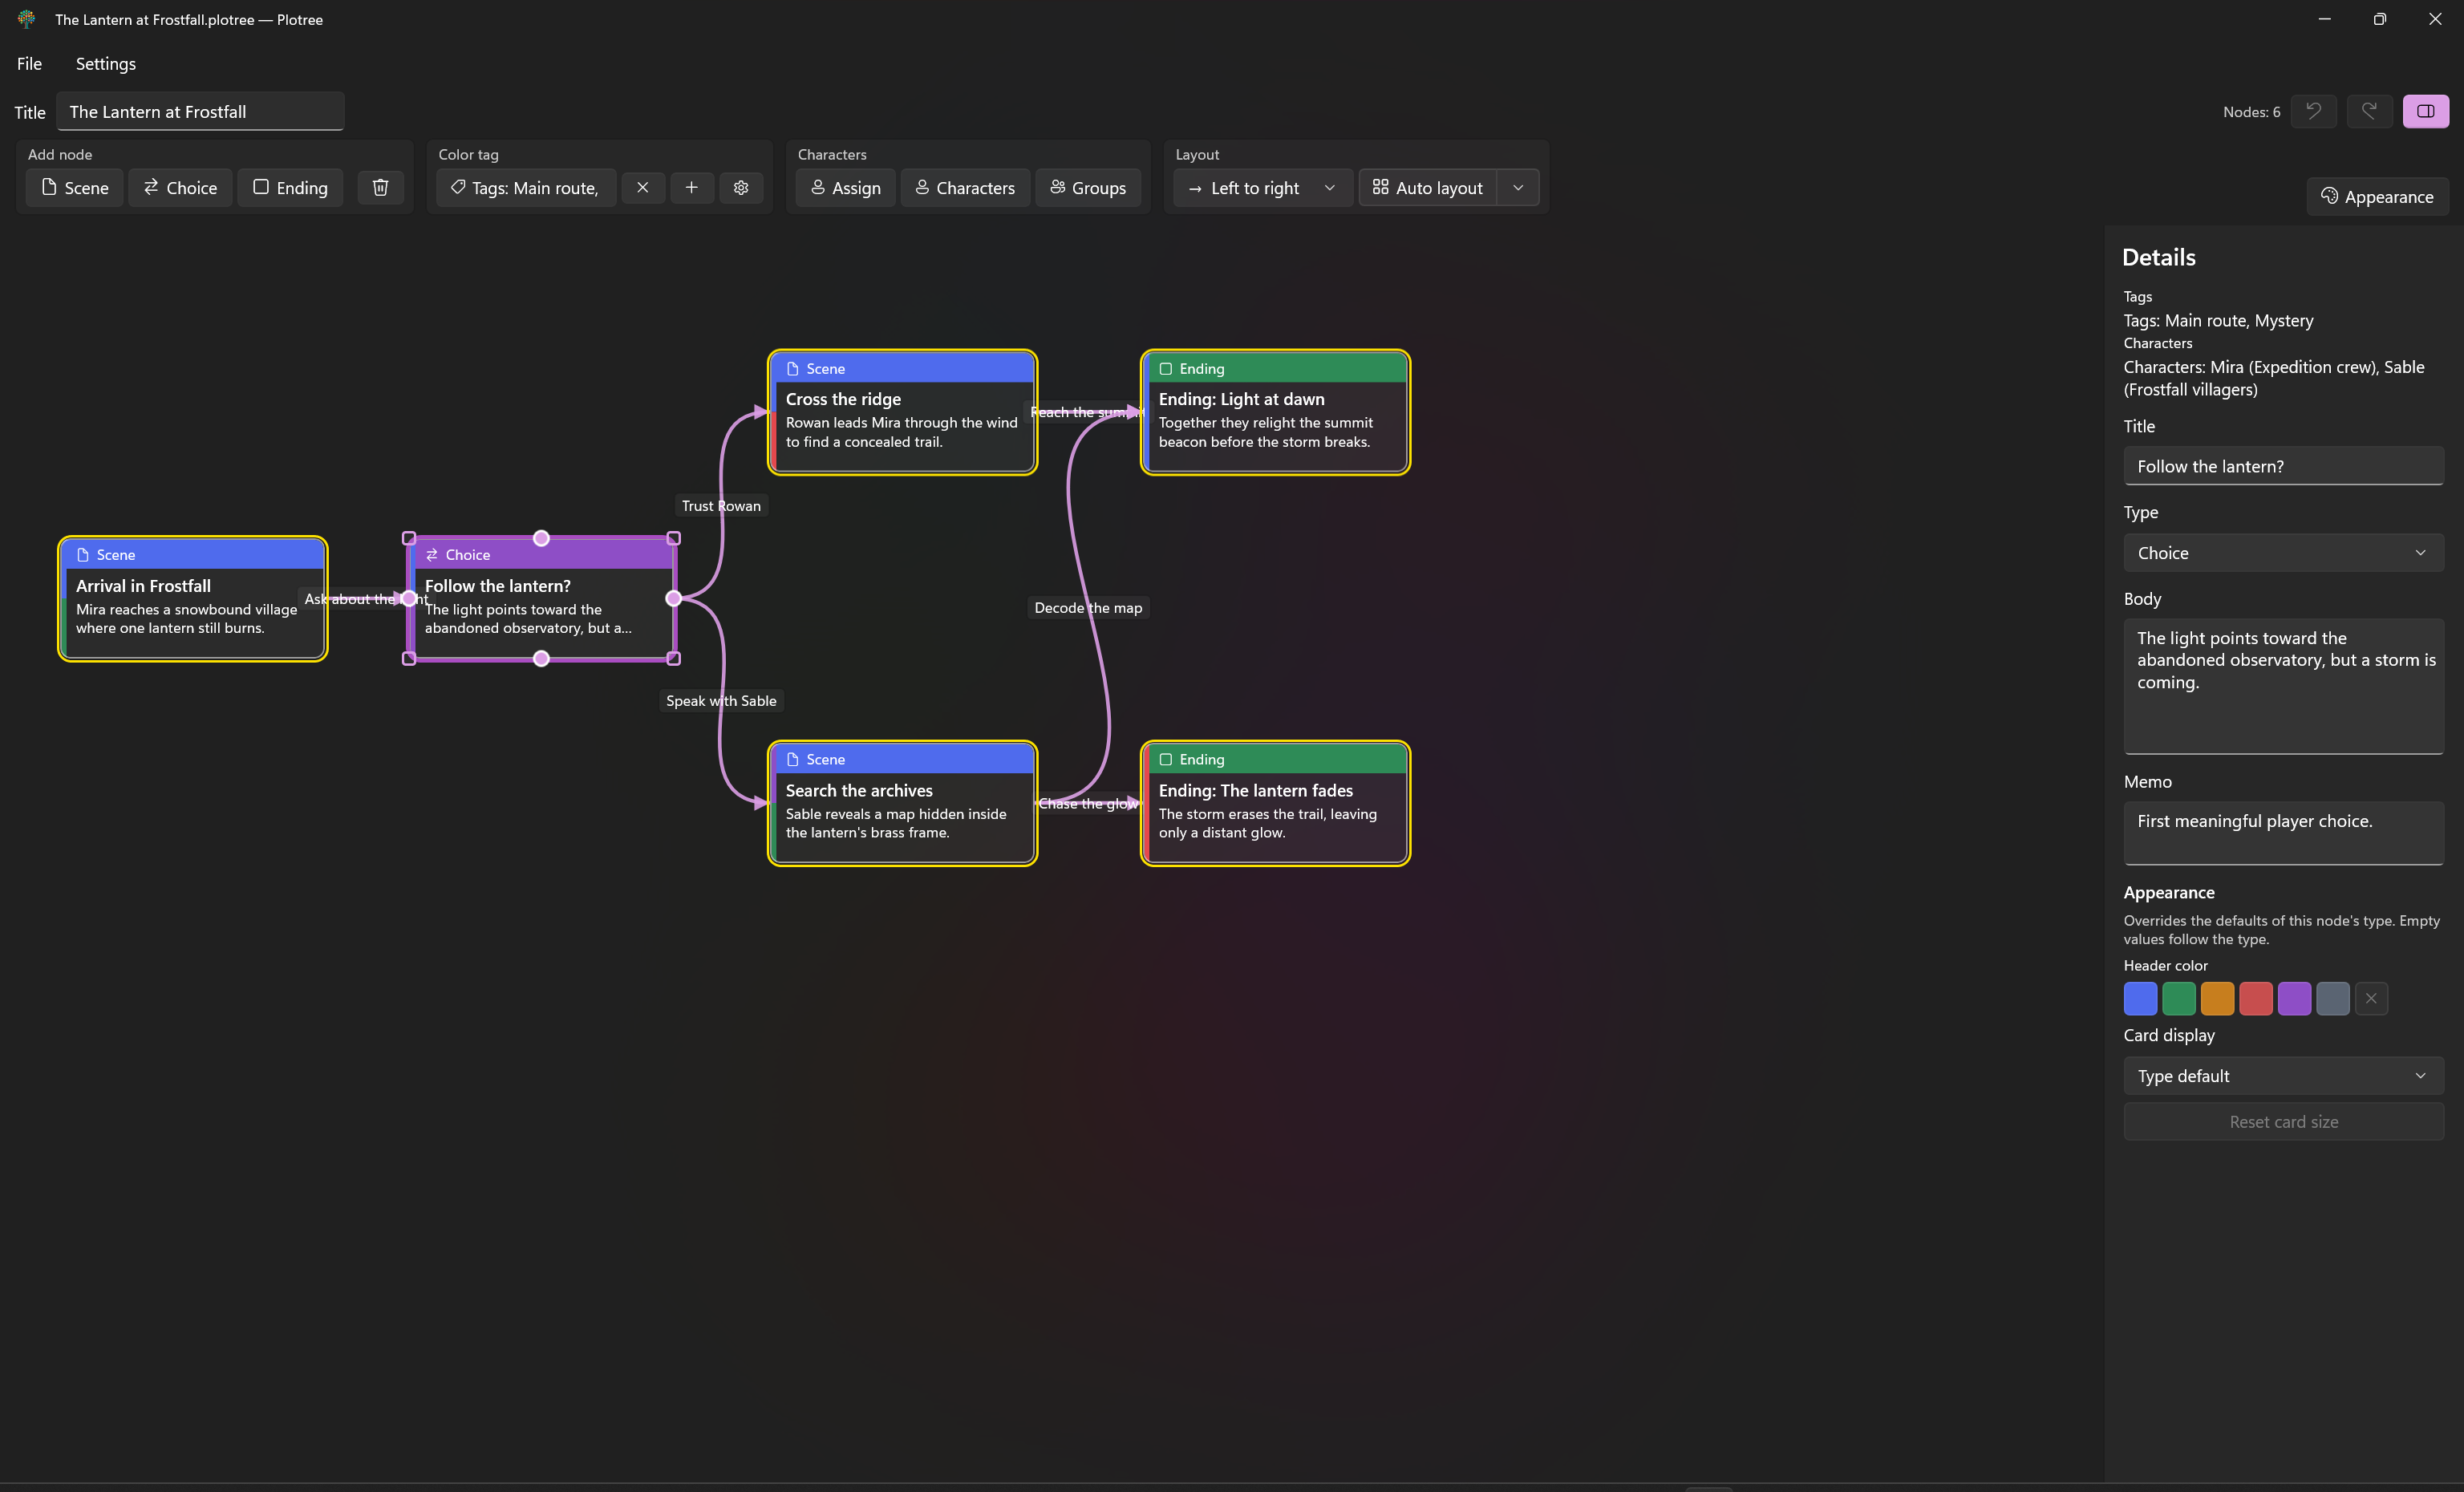
Ending nodes do not offer outgoing connection handles. Plotree also prevents self-connections, duplicate connections, and connections that target the start node.
Use Ctrl+C and Ctrl+V, the upper toolbar buttons, or a canvas context menu to copy and paste selected nodes. If both endpoints of a connection are copied, that connection is included. Referenced color tags, characters, and character groups are also carried into the destination project. Each paste is offset from the source so the new nodes remain visible.
Organize story context
Create color tags from the Color tag toolbar group, then use the tag picker to apply them to every selected node. The picker indicates a mixed state when only part of a multi-selection has a tag.
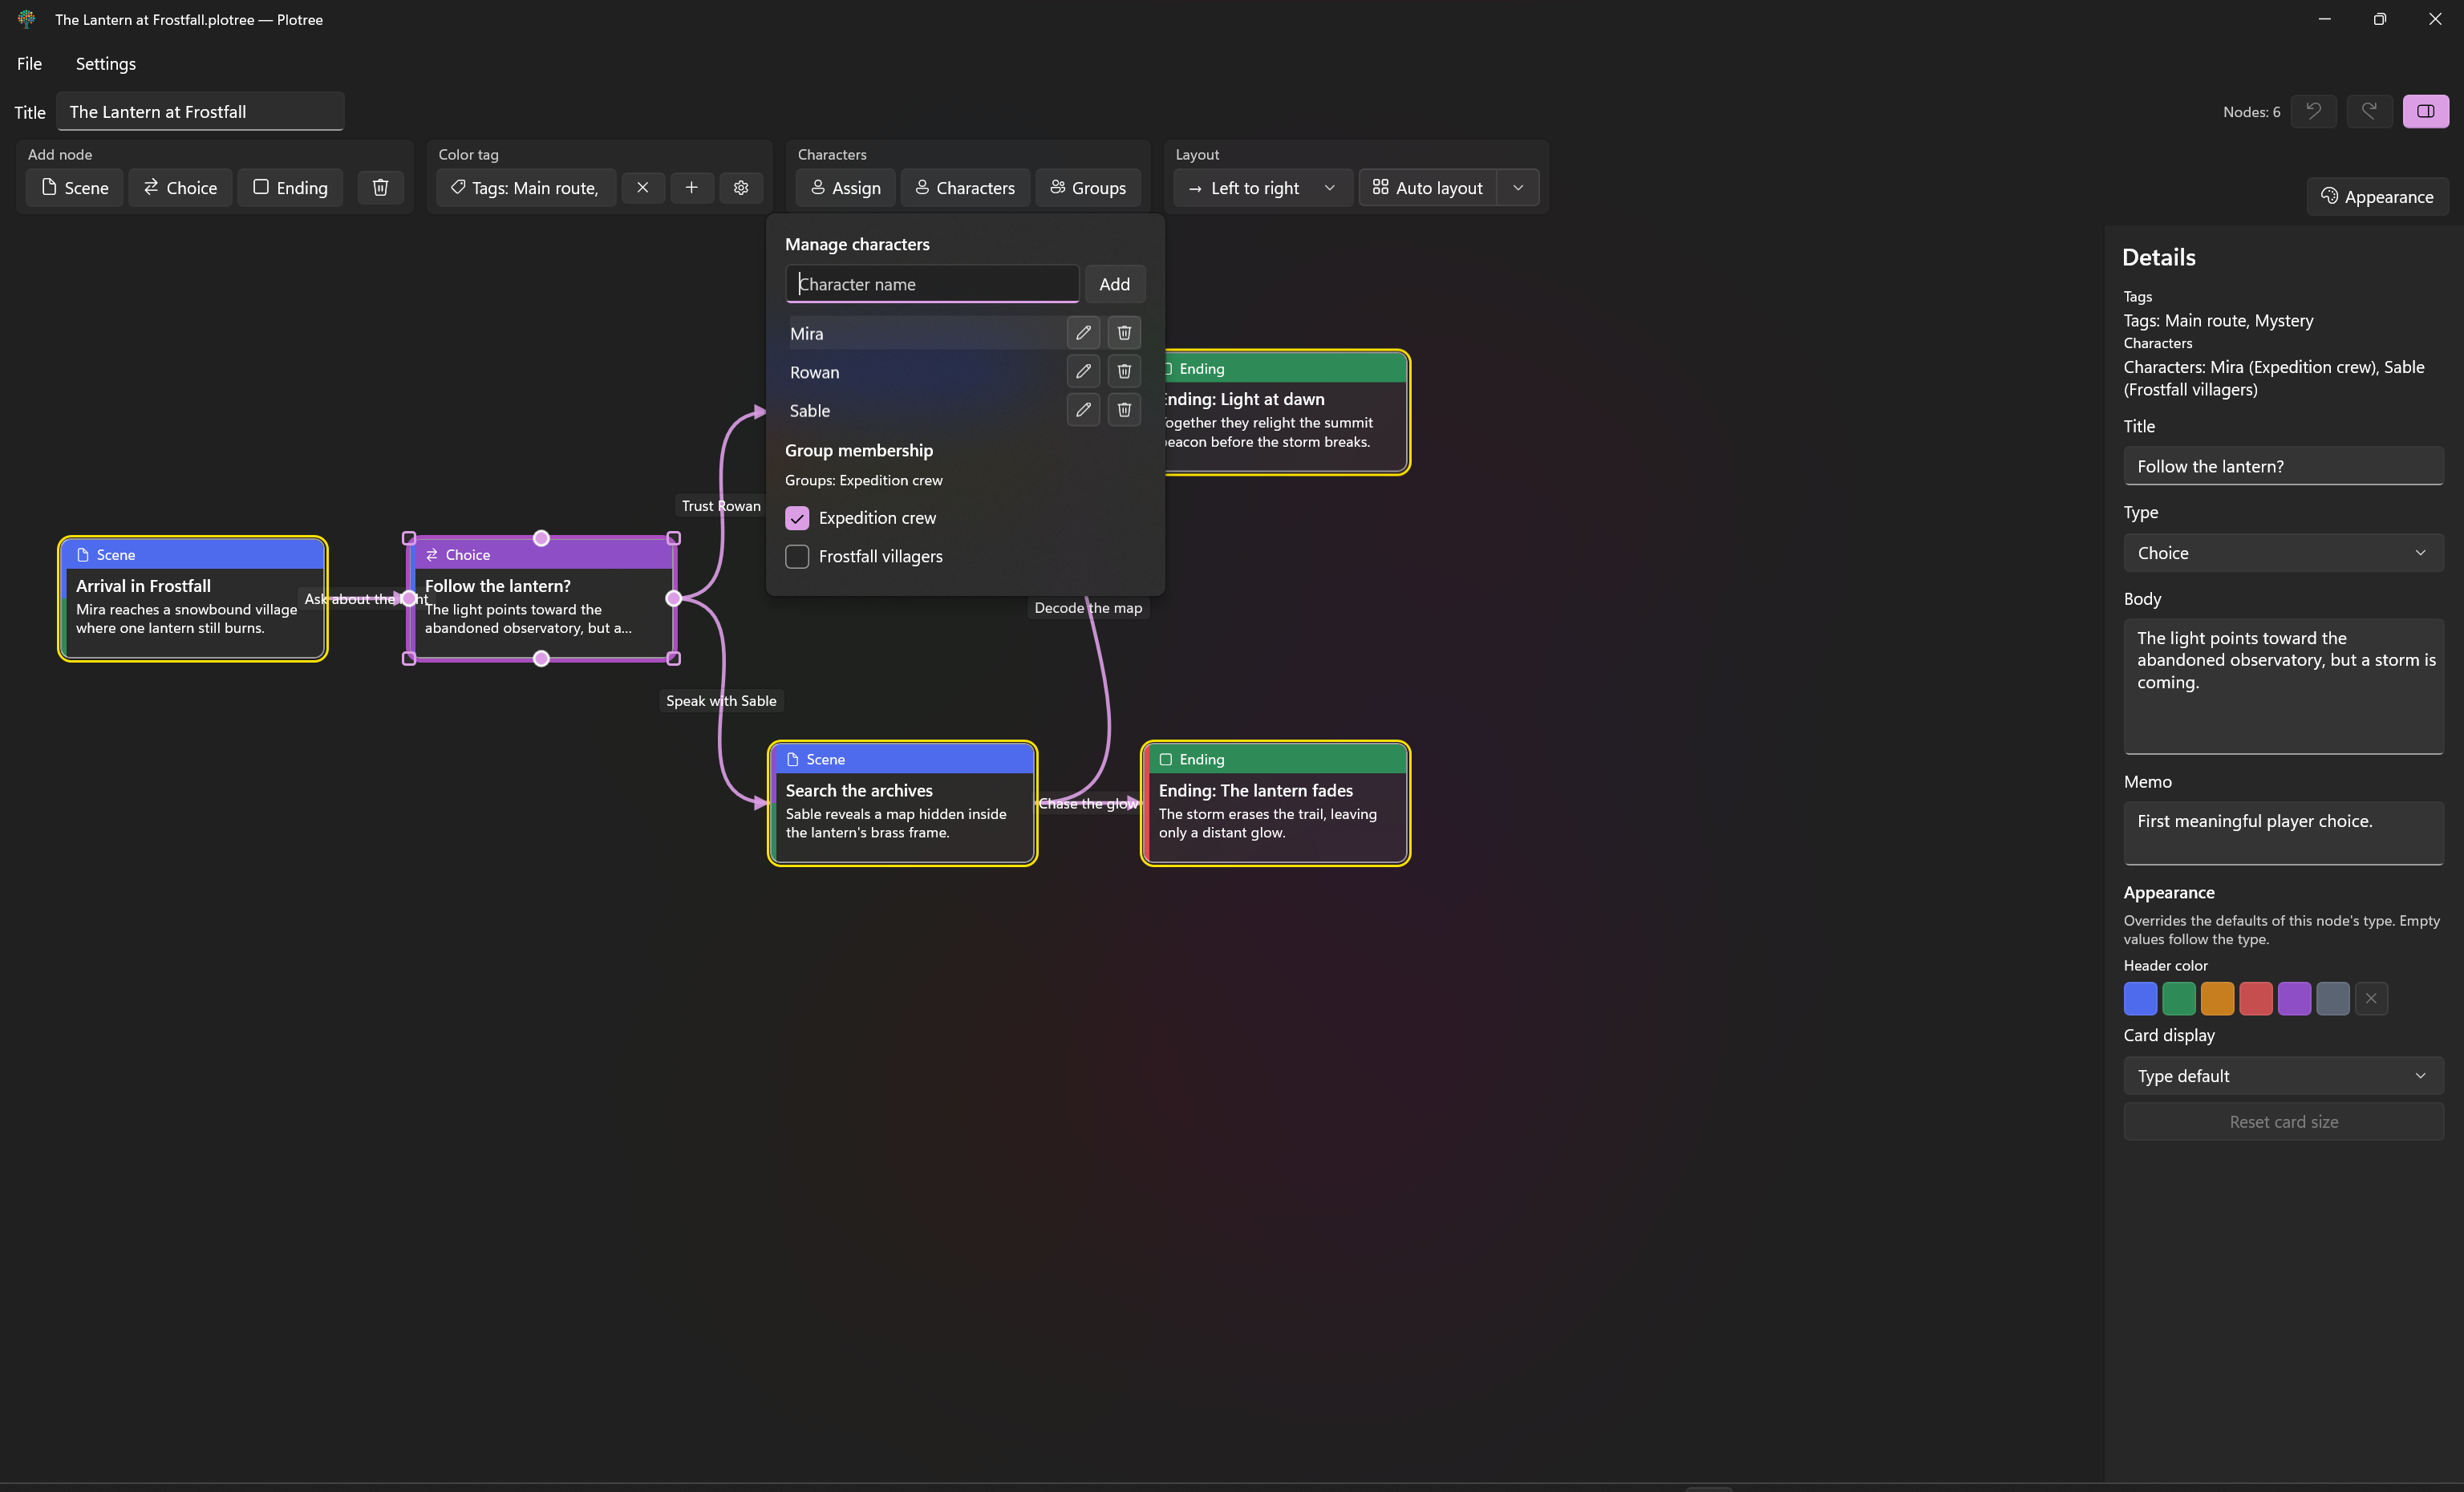
Use Characters to create people in the story and Groups to organize them. A character may belong to more than one group. Select nodes and use Assign to associate characters with those scenes or choices. The details panel summarizes the assigned tags and characters.
Arrange the graph
Drag a node to move it. Moved nodes become pinned, so automatic layout preserves their positions. Choose Left to right or Top to bottom from the layout direction list, then select Auto layout to arrange unpinned nodes. Use Relayout all from the split-button menu to clear pins and arrange every node.
Horizontal and vertical scroll bars appear automatically when graph elements extend beyond the visible area. The canvas supports these gestures:
| Task | Action |
|---|---|
| Pan | Left-drag empty canvas, middle-button drag, or hold Space while left-dragging |
| Scroll | Mouse wheel vertically, or Shift + mouse wheel horizontally |
| Zoom | Ctrl + mouse wheel, Ctrl++ / Ctrl+-, the upper toolbar buttons, or the canvas context menu |
| Select a node | Click it |
| Select several nodes | Shift + drag on empty canvas, or Ctrl/Shift-click nodes |
| Add a marquee to the selection | Ctrl+Shift + drag on empty canvas |
| Select all nodes | Ctrl+A outside a text field |
| Remove a selection | Esc |
| Move several nodes | Drag one of the selected nodes |
Customize card appearance
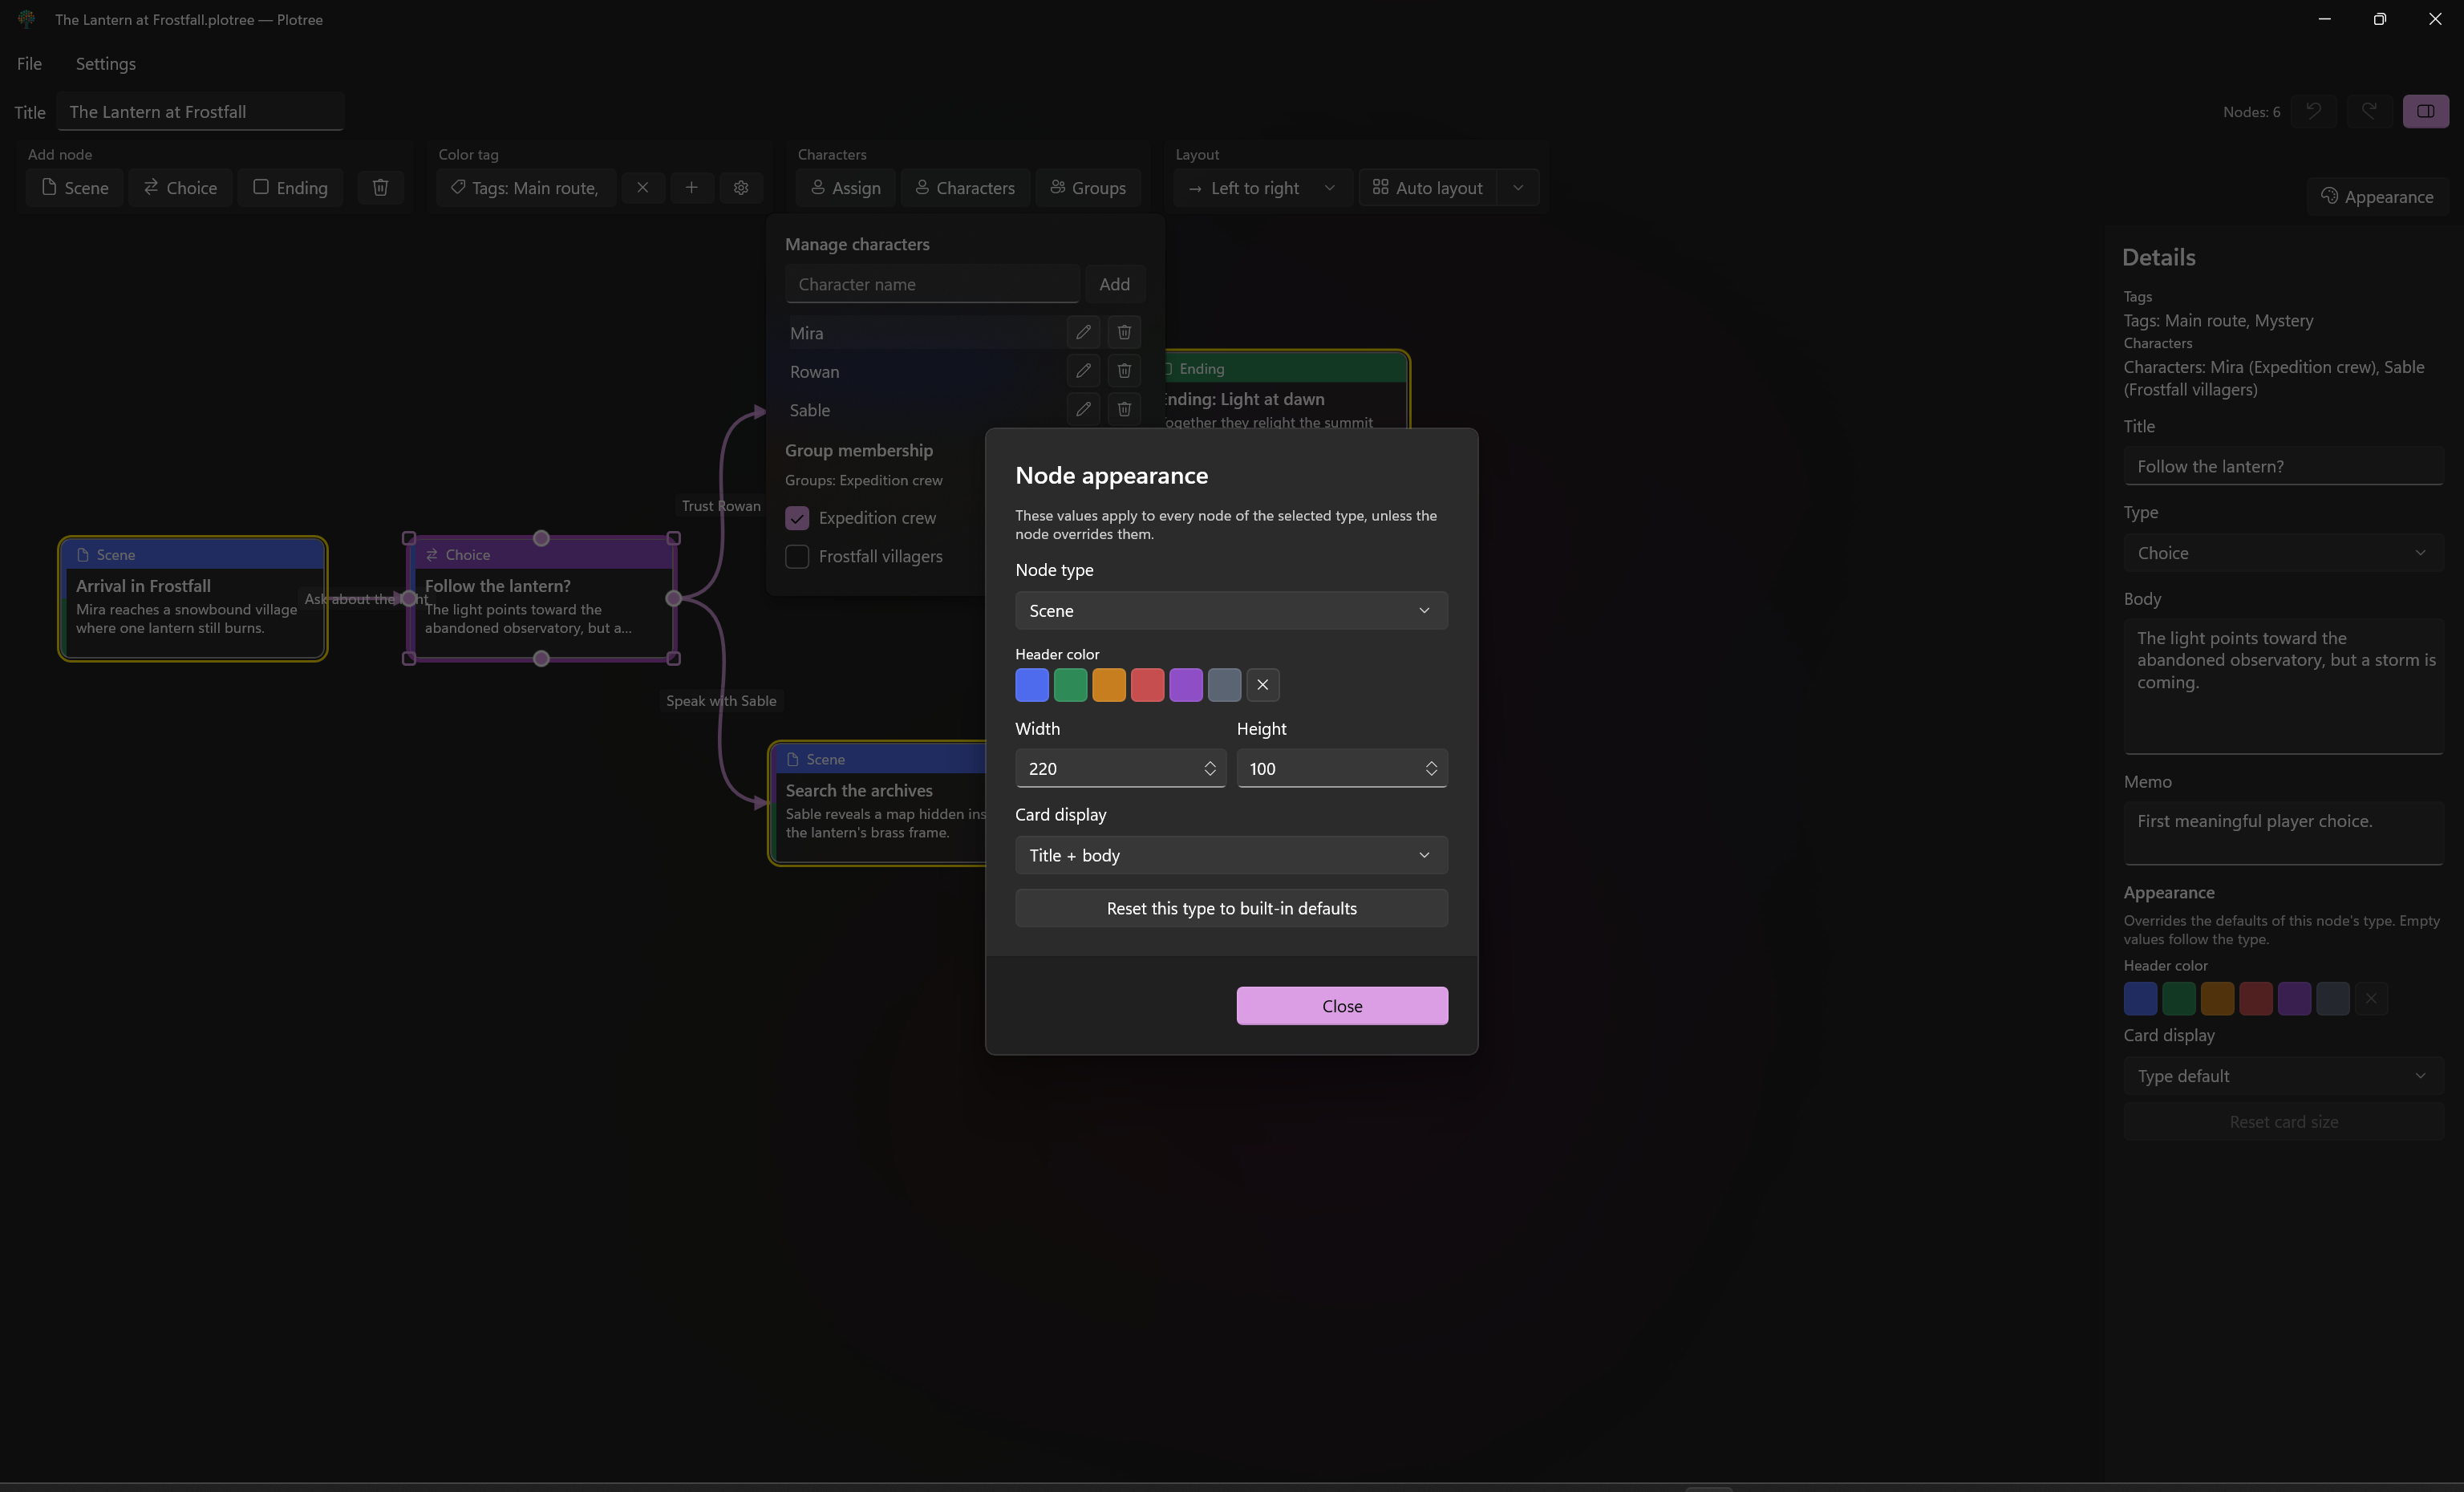
Select Appearance to configure default header color, width, height, and card display for scenes, choices, or endings. A selected node can override its type's defaults in the details panel. Use the reset controls to return to the applicable defaults.
Edit safely
Use Ctrl+Z and Ctrl+Y or the toolbar buttons to undo and redo document changes. Text edits, node drag or resize gestures, and each paste are collected as single history operations. Delete a selected node or connection with the Delete key or its context menu.
Export
Choose File > Export to create:
- PNG or SVG of the full graph
- Markdown or Text containing routes from each root node to an ending
Text exports also report dead ends and unreachable nodes.
Change the interface language
Choose Settings > Language, then select System default, Japanese, or English. Restart Plotree after changing the selection so every interface string is reloaded in the selected language.